Ornament Layering 101: Designer Techniques for a Full, Luxurious Tree
A truly breathtaking Christmas tree never happens by accident. Designers follow a specific sequence that builds depth, dimension, and fullness from the inside out. At ‘Tis The Season, we use these exact techniques when styling our custom trees for Scottsdale homes. The result is always the same: a lush, balanced, professionally finished look that feels magical from every angle.
If you have ever wondered how to make your tree look full and luxurious, this guide walks you through the simple pro-approved order to follow, plus the best rules of thumb to keep your tree looking elevated and intentional. In this blog, we will break down the full layering sequence so your tree can feel curated, elegant, and truly festive.
1. Lights: The Foundation
Lights set the mood and create the foundation for everything that follows. Begin by weaving them from the inside of the tree outward so the glow feels deep and layered rather than just sitting on the surface. A helpful rule is to use around 100 lights for every foot of tree height to maintain balanced brightness. For extra sparkle, mix in a few twinkle strands for movement that feels warm and festive. The biggest mistake to avoid is stringing lights only on the outer branches, which can make the tree look flat once ornaments are added.
2. Topper
Bring your tree to life by layering a mix of stems to add height and sparkle. Nestle cherished family heirlooms like angels and stars among the stems for a touch of nostalgia with a fresh twist. Finish the look by fluffing flowers or festive picks around the base of the topper, creating a beautifully balanced and eye-catching holiday centerpiece.
3. Garlands: Flow and Movement
Garlands tie your design together and guide the eye. Most garlands go on first before adding paired stem bundles of flowers, leaves, and berries. Drape them loosely in gentle swoops around the tree, or weave them through the branches for natural flow. As a rule of thumb, use approximately nine feet of garland for every one foot of tree height for full coverage. Avoid wrapping too tightly, which can choke the tree, or laying garlands flat, which makes them look stiff. Delicate garlands may be added at the very end of decorating over everything.
4. Stems & Sprays: Structural Drama
Stems and sprays create height, movement, and dimension. Decorative branches, glittered picks, faux berries, and floral stems fill gaps and give your tree its dynamic silhouette. Create bundles of 2-3 stems and place them diagonally. Avoid placing bundles directly below or across from existing groupings. Install stems in an upwards direction instead so they cascade in a downward position. Mixing textures like metallic, natural, or glittered pieces adds designer depth. Avoid uniform placement or pointing all sprays straight out, which can look spiky or chaotic.
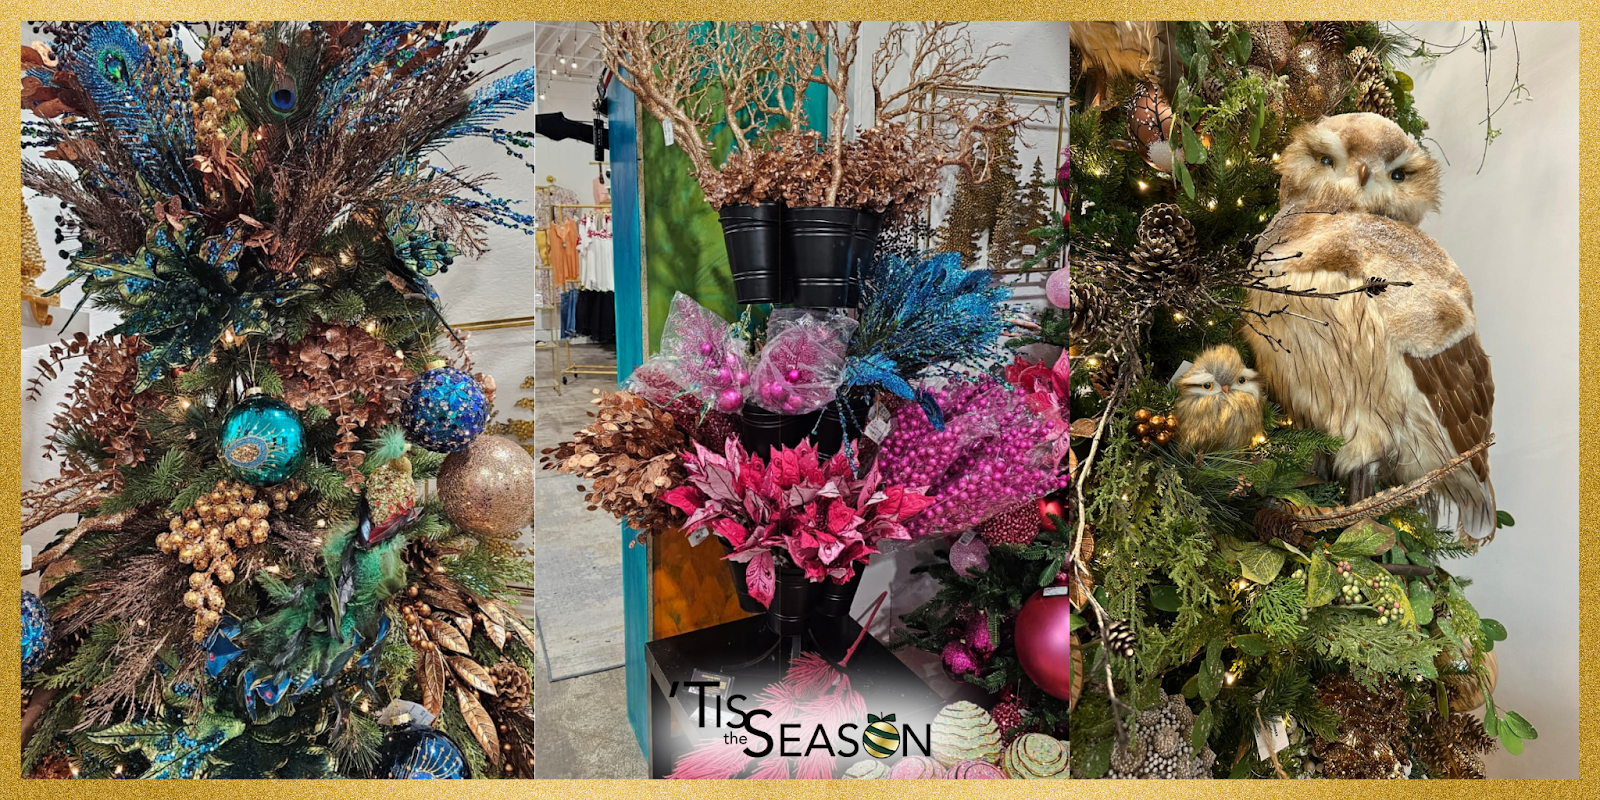
5. Statement Ornaments: Impact Decorations
Next, add your largest, most eye-catching pieces. Include lanterns, huge accessory items like hats and bows to truly make a bold statement. These anchor the design and define your tree’s personality. For a six-foot tree, five to seven oversized pieces spaced evenly in a zigzag pattern work beautifully. Place a few slightly deeper in the branches so the lights highlight them. Avoid grouping all statement pieces in one area, which can unbalance the tree.
6. Accent Ornaments: The Supporting Cast
Begin with your largest statement ornaments, starting with the 5” to 6” pieces. Tuck some deeper into the tree to instantly add depth and richness. Next, layer in medium and smaller ornaments, mixing shapes like balls, finials, and onion styles to create visual impact. Keep similar styles grouped together for a cohesive look, and play with a mix of finishes such as matte, shiny, and textured for extra sparkle. Avoid placing everything at the branch tips. Nestling a few ornaments deeper into the tree adds dimension and gives your tree that beautifully styled, designer finish.
7. Fillers: Volume and Depth
Fillers add richness and help eliminate see-through spots. These include ribbon bundles, floral picks, and small decorative ornaments placed deeper in the branches. Step back every few placements to check for gaps. Avoid stuffing all fillers on the outer tips; true depth comes from layering inside the tree first and working outward.
Balance & Depth Guidelines
For a beautifully balanced and eye-catching tree, choose a dominant color palette with multiple shades or tones for added dimension. Mix ornaments of different sizes and finishes to catch and reflect the light. Remember to step back often as you decorate; this helps you spot gaps that need filling and ensures your tree looks full, layered, and thoughtfully styled from every angle.
Common Mistakes to Avoid
Decorating only the visible side, full trees always look richer, even if guests see only one angle.
Using identical ornaments throughout, no hierarchy equals no depth.
Forgetting proportion, too many small ornaments look cluttered, too few large ones look sparse.
Ignoring lighting color temperature, warm lights flatter reds and golds, while cool whites highlight silvers and blues.
Create a Tree That Feels Like You
In the end, the most beautiful Christmas trees aren’t about perfection; they’re about connection. The sparkle in your ornaments should mirror the warmth of your home. When your decorations harmonize with your space, your Christmas tree becomes more than a centerpiece; it becomes part of your story.
At ‘Tis The Season, we specialize in bringing those stories to life with custom trees, hand-selected décor, and personalized styling that captures the magic of Christmas in every detail. Whether your vision leans toward glowing desert elegance or timeless holiday charm, our Scottsdale design team is here to help you craft a tree that feels authentically, wonderfully you. Visit tistheseasonscottsdale.com to explore holiday inspiration and services.
Reading time: 4.78 minutes